


Price: $6.63
(as of Apr 08, 2025 10:15:13 UTC - Details)
The Best Way to Apply Press-On Nails: A Comprehensive Guide
Introduction
If you're looking for a quick and glamorous way to elevate your nail game, press-on nails are your best friend! These pre-designed nails are not only stylish but also incredibly easy to apply. In this guide, we'll explore the best way to apply press-on nails, ensuring you achieve a salon-quality finish right at home. We'll cover everything from preparation to removal, focusing on practical tips and tricks to make the process seamless. Whether you're a beginner or a pro, this article will provide you with valuable insights into the world of press-on nails.
1. Understanding Press-On Nails
What Are Press-On Nails?
Press-on nails are artificial nails that come pre-decorated and ready to apply. They are perfect for anyone who wants beautiful nails without the commitment of a salon visit. Available in various shapes, sizes, and designs, you can easily find a set that suits your style.
Why Choose Press-On Nails?
Press-on nails are a fantastic alternative to traditional nail enhancements. They are cost-effective, easy to apply, and can be changed as often as you like. Plus, they are less damaging to your natural nails compared to acrylics or gels. If you're someone who loves experimenting with different looks, press-on nails are the way to go!
2. Preparing Your Natural Nails
Essential Steps for Nail Preparation
Before you apply your press-on nails, it's crucial to prepare your natural nails. This helps ensure a better fit and prolongs the wear time of your press-ons. Here’s how to prepare:
-
Clean Your Nails: Start by washing your hands and nails with soap and water. This removes any dirt or oils that could interfere with adhesion.
-
Buff the Surface: Gently buff your natural nails with a nail file. This creates a rough surface for the press-ons to adhere better.
- Push Back Cuticles: Use a cuticle pusher to gently push back your cuticles. This step helps prevent lifting and ensures a smooth application.
Nail Health Matters
Taking care of your natural nails is essential. If your nails are weak or damaged, consider applying a strengthening base coat before using press-on nails. This will protect your nails and enhance their health.
3. Choosing the Right Size
Finding the Perfect Fit
One of the keys to successfully applying press-on nails is choosing the right size. Most press-on nail kits come with multiple sizes to fit various nail beds. Here’s how to find your ideal match:
-
Measure Your Nails: Use a size chart included in your press-on kit to measure your natural nails. This ensures you select the perfect size for each finger.
- Mix and Match: Sometimes, you might need a different size for each finger. Don’t hesitate to mix and match sizes to achieve the best fit.
Importance of Proper Sizing
Wearing incorrectly sized nails can lead to discomfort and a less natural appearance. Ensuring a snug fit not only enhances the look but also improves the longevity of your press-ons.
4. Application Techniques
Step-by-Step Application
Now that you’ve prepared your nails and found the right sizes, it’s time to apply your press-on nails. Follow these simple steps for a flawless application:
-
Gather Your Supplies: You’ll need your press-on nails, nail glue (or adhesive tabs), a nail file, and a cuticle pusher.
-
Apply Adhesive: If using glue, apply a small amount to the back of the press-on nail and to your natural nail. If using adhesive tabs, peel off the backing and stick the tab to your natural nail.
-
Press and Hold: Align the press-on nail with your natural nail and press down firmly for about 10 seconds. This ensures a strong bond.
- File for Fit: Once applied, take a nail file to shape the edges of your press-ons if needed. This can create a more natural look.
Tips for a Long-Lasting Wear
To maximize the longevity of your press-on nails, avoid soaking your hands in water for prolonged periods and wear gloves while doing chores. This will help maintain the adhesive bond.
5. Maintaining Your Press-On Nails
Caring for Your Nails
Once your press-on nails are applied, proper care is essential to keep them looking fresh. Here are some easy maintenance tips:
-
Avoid Harsh Chemicals: Keep your nails away from harsh cleaning products and chemicals, as they can weaken the adhesive.
-
Moisturize Your Cuticles: Apply cuticle oil regularly to keep your cuticles hydrated and healthy.
- Gentle Handling: Be mindful of how you use your hands. Avoid using your nails as tools to prevent chipping or lifting.
When to Replace Your Nails
Press-on nails can last anywhere from a few days to a couple of weeks, depending on your activities and care. If you notice any lifting or damage, it’s time to replace them with a fresh set.
6. Removing Press-On Nails
Safe Removal Techniques
When it’s time to take off your press-on nails, do it safely to avoid damaging your natural nails. Here’s a simple removal process:
-
Soak Your Nails: Fill a bowl with warm, soapy water and soak your fingers for about 10-15 minutes. This will help loosen the adhesive.
-
Gently Push Off: Using a cuticle pusher, gently push the press-on nails off, starting from the sides. Never force them off to prevent damage to your natural nails.
- Clean Up Residue: If there’s any adhesive left on your nails, use a gentle nail polish remover to clean it off.
Post-Removal Care
After removing your press-on nails, take some time to care for your natural nails. Moisturize with cuticle oil and consider giving your nails a break before applying another set.
Conclusion
In summary, press-on nails are an excellent option for anyone seeking a stylish and convenient nail solution. By understanding the best way to apply press-on nails, from preparation and sizing to application and removal, you can enjoy beautiful nails without the hassle of a salon visit. Remember to take care of your natural nails, choose the right sizes, and follow proper application techniques to ensure a long-lasting and stunning look. With this guide, you’re now equipped to rock your press-on nails like a pro!
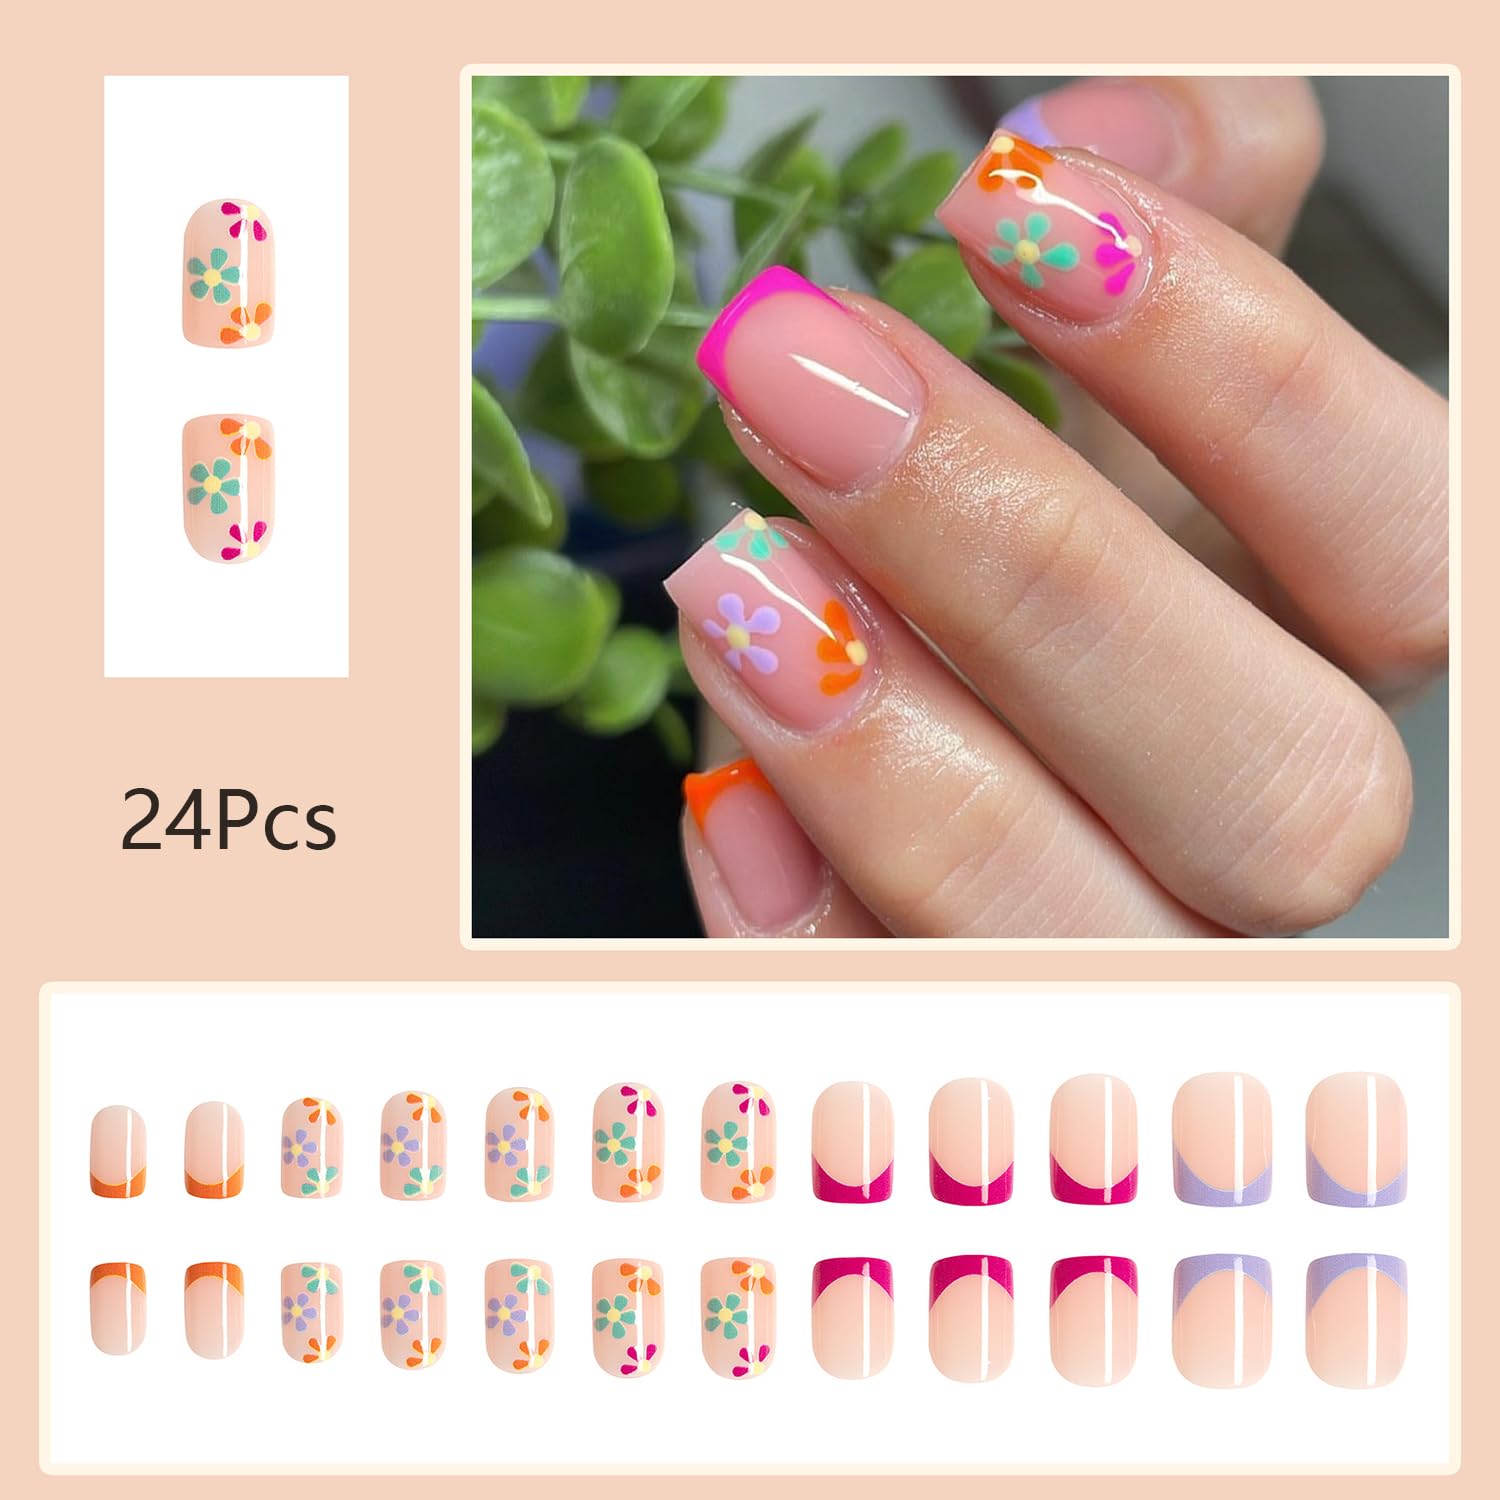
Package Content: You will get 24 pieces of beautifully spring press on nails(12 sizes), 24pcs Jelly gum, 1pcs Nail file, 1pcs wood stick, A pack of alcohol, create your own daily nails decoration.
Exquisite Design: Cute nails adapt to gentle color. The flower pattern embellishes vividly. Your perfect selection this spring, helping you to express confidence and charms in daily life and work time. Classic square shape, more elegant and charming. You can also trim and file to your preferred length and shape.
Easy To Use: Just clean your natural nails, then choose the right nail size, stick double-side adhesives on nails and press for a while, you can have romantic nails in just a few simple steps. Will last for several day with normal care, use glue will last longer.
Safety Material: These floral press on nails are made of quality acrylic material, non-toxic and gentle to your nails and skin, durable and not easy to be scratch, suitable for any occasion.
Kind Reminder: Nail glue is not included in the packaging, and the durability of jelly glue is limited. You can use your own glue. (Using nail glue stickers, fake nails can be reused, but nail glue stickers are not as good as liquid glue)